Sunday, July 11, 2010

WE DID IT!!!!

Dear Reader,

WE DID IT! We have supplied a cap for EVERY student who will enroll in the Choctaw Nation of Oklahoma Head Start Program for the Fall of 2010!

The most recent shipment of hats went from Kalamazoo, MI straight to Durant, OK. M.S.'s store collected the hats and P.S., her beloved husband of more than 47 years, packaged about 100 hats for shipment.

I received the third Thank You note from Rebecca Hawkins in yesterday's mail:

From 310 Hats
(Click the link to see a bigger picture.)

Please: If you, your friend, family, or loved one contributed a hat or helped in some way or another, PLEASE send me a JPG so I can make a Hats Contributor Collage for the students in Durant.

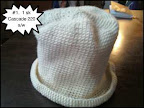
Thank you ALL so much for pitching in and helping get 310 hats to Oklahoma before the school year starts! Blessings on every one who helped in any way --- making hats, sending hats, helping with shipping costs, & c.

Warmly, E2

Crochet Basic Roll-Brimmed Hat

From 310 Hats


Worsted weight yarn
I hook (5 mm)
Marker


  • Chain 2
  • 6 sc in 2nd chain from hook. Place marker in last stitch.
  • 2 sc in each sc (12). Move marker.
  • (1 sc in first stitch, 2 sc in next stitch), repeat around (18 sc). Move marker.
  • (2 sc in each of first 2 sts, 2 sc in next stitch), repeat around (24 sc). Move marker.
  • (3 sc in ea of first 3 sts, 2 sc in next stitch), repeat around (30 sc). Move marker.
  • Continue in this manner for 13 or 14 rounds (increasing the number of scs before the increase by 1 each round) until your radius is about 3", diameter about 6", and circumference about 18". (78 scs or 84 scs). This should make a nice flat disc, which is the hat top.
  • Work even without increasing. It will start making a bowl shape. Continue even until the depth is about 6". It needs to be long enough and and big enough around to cover a Kindergarten-age child's head and ears.
  • To create a rolled brim, increase the stitches by 50%: (1 sc, 2 sc in next stitch) repeat around.
  • Work a few rounds even.
  • Slip stitch around to give a nice tight, neat edge.
  • Cut yarn. Work in ends.
  • If the hat is too "airy", you can weave colored yarns through the stitch spaces. Colored yarns will be very decorative.

  •