Warning - if you are prone to obsessive thinking or compulsive behavior, do NOT start doing mosaic knitting. You are warned. Seriously. You think regular knitting leads to the "just one more row and then I'll stop" phenomenon? HA! You ain't seen nothin' until you start mosaic knitting.
Here is why mosaic knitting is particularly addictive:
1 - First of all, since it takes 2 rows of knitting for every one row of the chart, you automatically want to do 2 rows of knitting at a minimum.
2 - And then you think, "But if I stop now, I might not remember which yarn to pick up next."
3 - And then --- on top of that mental twist --- you think "just one more row so I can see how the picture is progressing."
4 - Mind you, "just one more row" is really "just two more rows" because of fact number one (see above).
You get SUCKED INTO THE VORTEX OF KNITTING MOSAIC UNTIL YOUR FINGERS CANNOT MOVE ANY MORE.
Seriously.
You have been warned.
See the latest hat which is an eagle mosaic hat. The mosaic pattern is from MOSAIC KNITTING by Barbara Walker. The yarn is Lion Brand's Wool-Ease. I used 5 mm needles. The double-thick ribbing is done on 80 stitches, and then I increased to 88 to start the eagle mosaic. There are four full eagles around the hat, four eagle heads below, and four eagle tails above.
On my hooks to finish - two earflap hats (they just need the flaps).
Next mosaic - puppy dogs.
Subscribe to:
Post Comments (Atom)
Crochet Basic Roll-Brimmed Hat
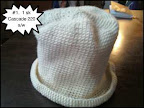 |
| From 310 Hats |
Worsted weight yarn
I hook (5 mm)
Marker


Cool birds - can't wait to see the dogs!
ReplyDeleteE1