Wednesday, April 7, 2010

one for one swap and LOADS of new pictures

I will be heading to a tatting conference soon! (Yeah, me!) I will be bringing a set of mittens and hat for Seneca Santa when I go. I started a hat/mitten set in blue left over from the Wounded Warrior afghan. Hat: done. Mitten 1: done. Mitten 2: ran out of yarn at the top of the pinky! WAH! So I grabbed a skein of lavender and made a pair of mittens in lavender. I'll swap one of the lavender hats from the bag with the blue hat from the yarn mentioned above. E1 also mailed me a hat for Seneca Santa! So, I'll be finishing up my pre-conference homework and packing 2 hats and a pair of mittens in my luggage. (I can't wait! Is it Friday yet?)

E1 sent me a photo disk with the pictures of all her hats! I will be uploading them to the blog for your OOOOH-ing and AHHHH-ing pleasure as soon as I get a chance. You'll enjoy seeing them.

No comments:

Post a Comment

Crochet Basic Roll-Brimmed Hat
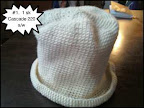
From 310 Hats


Worsted weight yarn
I hook (5 mm)
Marker


  • Chain 2
  • 6 sc in 2nd chain from hook. Place marker in last stitch.
  • 2 sc in each sc (12). Move marker.
  • (1 sc in first stitch, 2 sc in next stitch), repeat around (18 sc). Move marker.
  • (2 sc in each of first 2 sts, 2 sc in next stitch), repeat around (24 sc). Move marker.
  • (3 sc in ea of first 3 sts, 2 sc in next stitch), repeat around (30 sc). Move marker.
  • Continue in this manner for 13 or 14 rounds (increasing the number of scs before the increase by 1 each round) until your radius is about 3", diameter about 6", and circumference about 18". (78 scs or 84 scs). This should make a nice flat disc, which is the hat top.
  • Work even without increasing. It will start making a bowl shape. Continue even until the depth is about 6". It needs to be long enough and and big enough around to cover a Kindergarten-age child's head and ears.
  • To create a rolled brim, increase the stitches by 50%: (1 sc, 2 sc in next stitch) repeat around.
  • Work a few rounds even.
  • Slip stitch around to give a nice tight, neat edge.
  • Cut yarn. Work in ends.
  • If the hat is too "airy", you can weave colored yarns through the stitch spaces. Colored yarns will be very decorative.

  •