Tuesday, September 4, 2012

32 hats to be mailed today

Photos to come. Thirty-two hats "just" fits into a large, long, flat rate box. The sides of the box are a little bulging. I hope the PO will accept it, versus making me split the contents and then mailing in two boxes.

Here's the status: E1 - 100 hats, her friend P  - 100 hats, my friend D - 43 hats, I am mailing 32 hats, my friend DB already mailed 18 hats. This totals to 293 hats, I believe. I have promised 17 more hats within the next few weeks. That should meet the 2012 goal of 310 hats.

E2 - 9/4/2012


UPDATE - After work I mailed the hats. They are on their way in this bulging box:

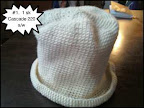
Some of the hats in the box you've already seen. Here's a slideshow of some more:


Click the link above if you want to read the captions on pictures in the slideshow.
Ask questions if you want more details about any cap. I'll do my best to answer.

No comments:

Post a Comment

Crochet Basic Roll-Brimmed Hat

From 310 Hats


Worsted weight yarn
I hook (5 mm)
Marker


  • Chain 2
  • 6 sc in 2nd chain from hook. Place marker in last stitch.
  • 2 sc in each sc (12). Move marker.
  • (1 sc in first stitch, 2 sc in next stitch), repeat around (18 sc). Move marker.
  • (2 sc in each of first 2 sts, 2 sc in next stitch), repeat around (24 sc). Move marker.
  • (3 sc in ea of first 3 sts, 2 sc in next stitch), repeat around (30 sc). Move marker.
  • Continue in this manner for 13 or 14 rounds (increasing the number of scs before the increase by 1 each round) until your radius is about 3", diameter about 6", and circumference about 18". (78 scs or 84 scs). This should make a nice flat disc, which is the hat top.
  • Work even without increasing. It will start making a bowl shape. Continue even until the depth is about 6". It needs to be long enough and and big enough around to cover a Kindergarten-age child's head and ears.
  • To create a rolled brim, increase the stitches by 50%: (1 sc, 2 sc in next stitch) repeat around.
  • Work a few rounds even.
  • Slip stitch around to give a nice tight, neat edge.
  • Cut yarn. Work in ends.
  • If the hat is too "airy", you can weave colored yarns through the stitch spaces. Colored yarns will be very decorative.

  •