Wednesday, October 23, 2013

Boxed and sent fifty more hats last Friday

On Friday, 10/18, I boxed up and sent fifty more hats!

Here's the album with photos.
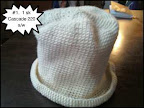
Hats Mailed 18 October 2013


Here's the slideshow:


You know ---- knitting or crocheting the hats is easier than photographing and blogging them. I keep counting the hats in that album... over, and over, and over again. I get a different number every time. I'm SURE I mailed fifty. But I'm not sure I photographed and uploaded fifty.

We have met our goal for the 13-14 year:
E1 and her friend P from MA - 135
E2 - 100
D in Iowa and D in California - 80
That's 315!

HOORAY!

Any new hats now can go towards the 14-15 school year.
I know I'm already working on the stash for 14-15. And this time I'm darning the ends as I make the hats. Leaving a hundred hats to darn is a drag.

Thanks to EVERYONE who's pitched in, no matter what way: cheer leading, yarn donation, knitting, whatever. It's ALL good.

No comments:

Post a Comment

Crochet Basic Roll-Brimmed Hat

From 310 Hats


Worsted weight yarn
I hook (5 mm)
Marker


  • Chain 2
  • 6 sc in 2nd chain from hook. Place marker in last stitch.
  • 2 sc in each sc (12). Move marker.
  • (1 sc in first stitch, 2 sc in next stitch), repeat around (18 sc). Move marker.
  • (2 sc in each of first 2 sts, 2 sc in next stitch), repeat around (24 sc). Move marker.
  • (3 sc in ea of first 3 sts, 2 sc in next stitch), repeat around (30 sc). Move marker.
  • Continue in this manner for 13 or 14 rounds (increasing the number of scs before the increase by 1 each round) until your radius is about 3", diameter about 6", and circumference about 18". (78 scs or 84 scs). This should make a nice flat disc, which is the hat top.
  • Work even without increasing. It will start making a bowl shape. Continue even until the depth is about 6". It needs to be long enough and and big enough around to cover a Kindergarten-age child's head and ears.
  • To create a rolled brim, increase the stitches by 50%: (1 sc, 2 sc in next stitch) repeat around.
  • Work a few rounds even.
  • Slip stitch around to give a nice tight, neat edge.
  • Cut yarn. Work in ends.
  • If the hat is too "airy", you can weave colored yarns through the stitch spaces. Colored yarns will be very decorative.

  •