Tuesday, December 29, 2009

E2's Hat Three

I finished Hat #3. It is a purple cap, based upon the classic Knit-a-Cap basic pattern. Cast on 56 stitches with knotted cast on; rib for 20 rounds; stockinette for 30 rounds; double-decreases at top based on 8-stitch "pizza slices". Two rounds of stockinette between decrease rounds. When there were only 14 stitches remaining, I drew the yarn through. I used a needle size 8 and stitched very loosely.

It appears in a photo with a blue head-band. Both are Wool-Ease yarn. The headband just uses the remainder of a ball of yarn left over from some other project. It's not counted as a cap but it WILL keep ears toasty warm, especially if worn folded in half.

I think Hat 4 will be the same yarn as the crochet cap in #2. I have another whole skein of that, plus the remainder of the first skein.  I think the yarn was originally intended for mittens, but I've made many mittens lately and I think all the hands at this house are well protected for this winter... assuming my little kittens don't LOSE their mittens!

-E2

No comments:

Post a Comment

Crochet Basic Roll-Brimmed Hat
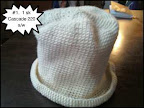
From 310 Hats


Worsted weight yarn
I hook (5 mm)
Marker


  • Chain 2
  • 6 sc in 2nd chain from hook. Place marker in last stitch.
  • 2 sc in each sc (12). Move marker.
  • (1 sc in first stitch, 2 sc in next stitch), repeat around (18 sc). Move marker.
  • (2 sc in each of first 2 sts, 2 sc in next stitch), repeat around (24 sc). Move marker.
  • (3 sc in ea of first 3 sts, 2 sc in next stitch), repeat around (30 sc). Move marker.
  • Continue in this manner for 13 or 14 rounds (increasing the number of scs before the increase by 1 each round) until your radius is about 3", diameter about 6", and circumference about 18". (78 scs or 84 scs). This should make a nice flat disc, which is the hat top.
  • Work even without increasing. It will start making a bowl shape. Continue even until the depth is about 6". It needs to be long enough and and big enough around to cover a Kindergarten-age child's head and ears.
  • To create a rolled brim, increase the stitches by 50%: (1 sc, 2 sc in next stitch) repeat around.
  • Work a few rounds even.
  • Slip stitch around to give a nice tight, neat edge.
  • Cut yarn. Work in ends.
  • If the hat is too "airy", you can weave colored yarns through the stitch spaces. Colored yarns will be very decorative.

  •