E2 made Hat 2 yesterday with one skein of Plymouth Encore (stash!). It's a crocheted tam. I'll jot down the pattern later. Basically: crochet ribbing long enough to go around my first grader's head, then rounds to make it deep enough to cover ears, then decreases to close the top. Came out cute. My first grader wants it! Picture in slide-show.
Hat 3 is purple Wool-Ease by Lion Brand. I've casted on with the "knotted cast-on", slightly decorative and just as stretchy as regular long-tail cast on. Ack - can't easily find an online description of it. Cast on two with long-tail method, then drop back stitch over front stitch (as if casting off). The remaining stitch is your first real stitch. Then cast on two more with long-tail, and drop the first of those two over the latter of those two. Now you have two real stitches on the needle. Repeat until you have enough stitches. WARNING - you must leave TWICE as long a long-tail as you normally would because you're popping off half of the stitches you put on the needle!
I've done 10 rows of ribbing on 56 stitches and haven't decided what I'll do next.
More hats are coming to me in the mail! HOORAY! Thank you to Angela, Denise, Desiree, Kim and any others who are pitching in to the cause!
As my high school sophomore says, "Three hundred ten hats is a LOT of hats." Yes, it is. But many hands make the task possible!
With deepest gratitude, E2
Subscribe to:
Post Comments (Atom)
Crochet Basic Roll-Brimmed Hat
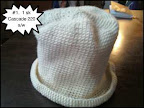 |
| From 310 Hats |
Worsted weight yarn
I hook (5 mm)
Marker


No comments:
Post a Comment