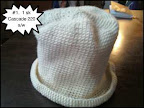
Finished another pink Silenzio hat. It's a basic cap with a ripple Old Shale cuff border.
I bought five skeins of pink Silenzio and five of pumpkin orange Silenzio. Each cap has taken a little more than a skein. So, I don't have enough pink left for another cap. I don't think the pink and pumpkin will work well together. Maybe I'll try it when I only have a little pumpkin left.
To make this one, I made the Old Shale border and then thought "Uh oh, I have to do the rest of the cap in purl in order to make the cuff flip up and still look right." Ah, instead I turned the cap inside out and knit the rest of it. There's ONE little spot where I transition from cuff to cap that has a little hole from the turn. But no one is going to see it. The cuff is stitched to the cap at the three peaks of the ripples.
Next time I try this, however, I'll try doing the lace in purl instead of knit. Then I can just switch to knit for the cap without having to turn. Don't know if the lace will work well when it's purl-based but it's worth trying. I think I'll try it in less fuzzy yarn, however. In case it doesn't work, less fuzzy yarn will cooperate with the tedious "un-stitching" process.
I think the pumpkin colored yarn might make good hats for boys, so I don't know if I'll do any lace cuffs on the pumpkin hats.
Subscribe to:
Post Comments (Atom)
Crochet Basic Roll-Brimmed Hat
 |
| From 310 Hats |
Worsted weight yarn
I hook (5 mm)
Marker


No comments:
Post a Comment