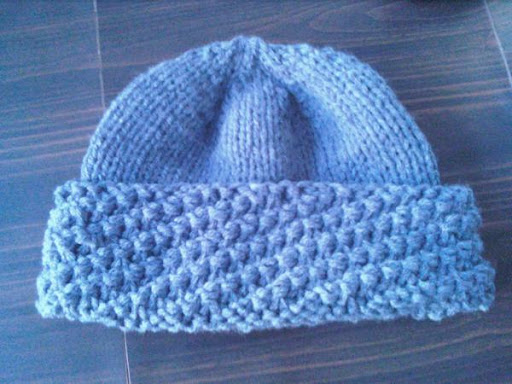
There's a new photo in the slide show of the cap I finished last night. It's a gray cap, made of Phildar's LEADER yarn (100% acrylic, quite soft / sadly, now discontinued). The cuff is spiral rib and the body of the cap is stockinette. The cap was done with doubled yarn on 6.5 mm needles. The top decreases are straight line "pie wedge" decreases (as opposed to spiraling round-top decreases).
Spiral-rib cuffed cap - to make:
6.5 mm needles, worsted yarn doubled
Cast on 55 and join in round without twist.
K2 P2 for 15 rounds. The odd number of stitches causes the spiral rib.
Switch to stockinette for about 30 rounds.
Then the decreases are on slices of 11: (K1, k2tog, k6, ssk) repeat 5 times
Knit a row or two even
Next set of decreases are on 9 stitches: (k1, k2tog, k4, ssk) repeat 5 times
Even for a row or two
Next set of decreases are on 7 stitches: (k1, k2tog, k2, ssk) repeat 5 times
Even for a row or two
Next set of decreases are on 5 stitches: (k1, k2tog, ssk) repeat 5 times.
You may end here by cutting yarn through and drawing through last stitches.
Or, you may work another row or two even and then do one last decrease set on 3 stitches: (k1, k2tog) repeat 5 times. Cut yarn. Draw through.
Darn in ends.
Done.
Subscribe to:
Post Comments (Atom)
Crochet Basic Roll-Brimmed Hat
 |
| From 310 Hats |
Worsted weight yarn
I hook (5 mm)
Marker


No comments:
Post a Comment